
Three DIYs for the Cheering Section

I’ve always had a bit of a competitive side when it’s come to sports. I’ve naturally gotten into the game, maybe at times, a bit too much. It’s never mattered what game it is we’re playing, my team is going to win, and if I’m not playing the game itself, I will always be cheering on the underdog—extra loud, extra rowdy. However, since I got married, I haven’t been to as many sporting events, or even watched the big game on TV. He’s never really been into sports, which is honestly, perfectly okay with me. I do love a game, but I’ve never been one to really follow a team to a player’s-name basis. (With the one exception of the Phoenix Suns circa 2006 when they had the best starting lineup we’ve seen in over a decade. This is a rhetorical statement, and no debate shall be had about it.)
These days, I don’t find myself in the cheering section that often. But now I have a younger sister-in-law, Savannah, who is graduating college with her Bachelor’s degree. She’s the a first generation graduate and the youngest in her family, and I could not be more proud of her! We’ve always known she’s destined to be successful, kind, considerate, hard-working, and ambitious.
Now, cue said older sister-in-law with a DIY blog, a competitive spirit, and who, out of love, finds bits of joy in, delicately and comically, embarrassing others. I’ve made not one, not two, but three DIYs to help cheer Savannah on from the audience: a giant foam finger, a felt pennant, and an oversized-head cut out.
DIY No. 1: Giant Foam Finger

Here’s What You Need:
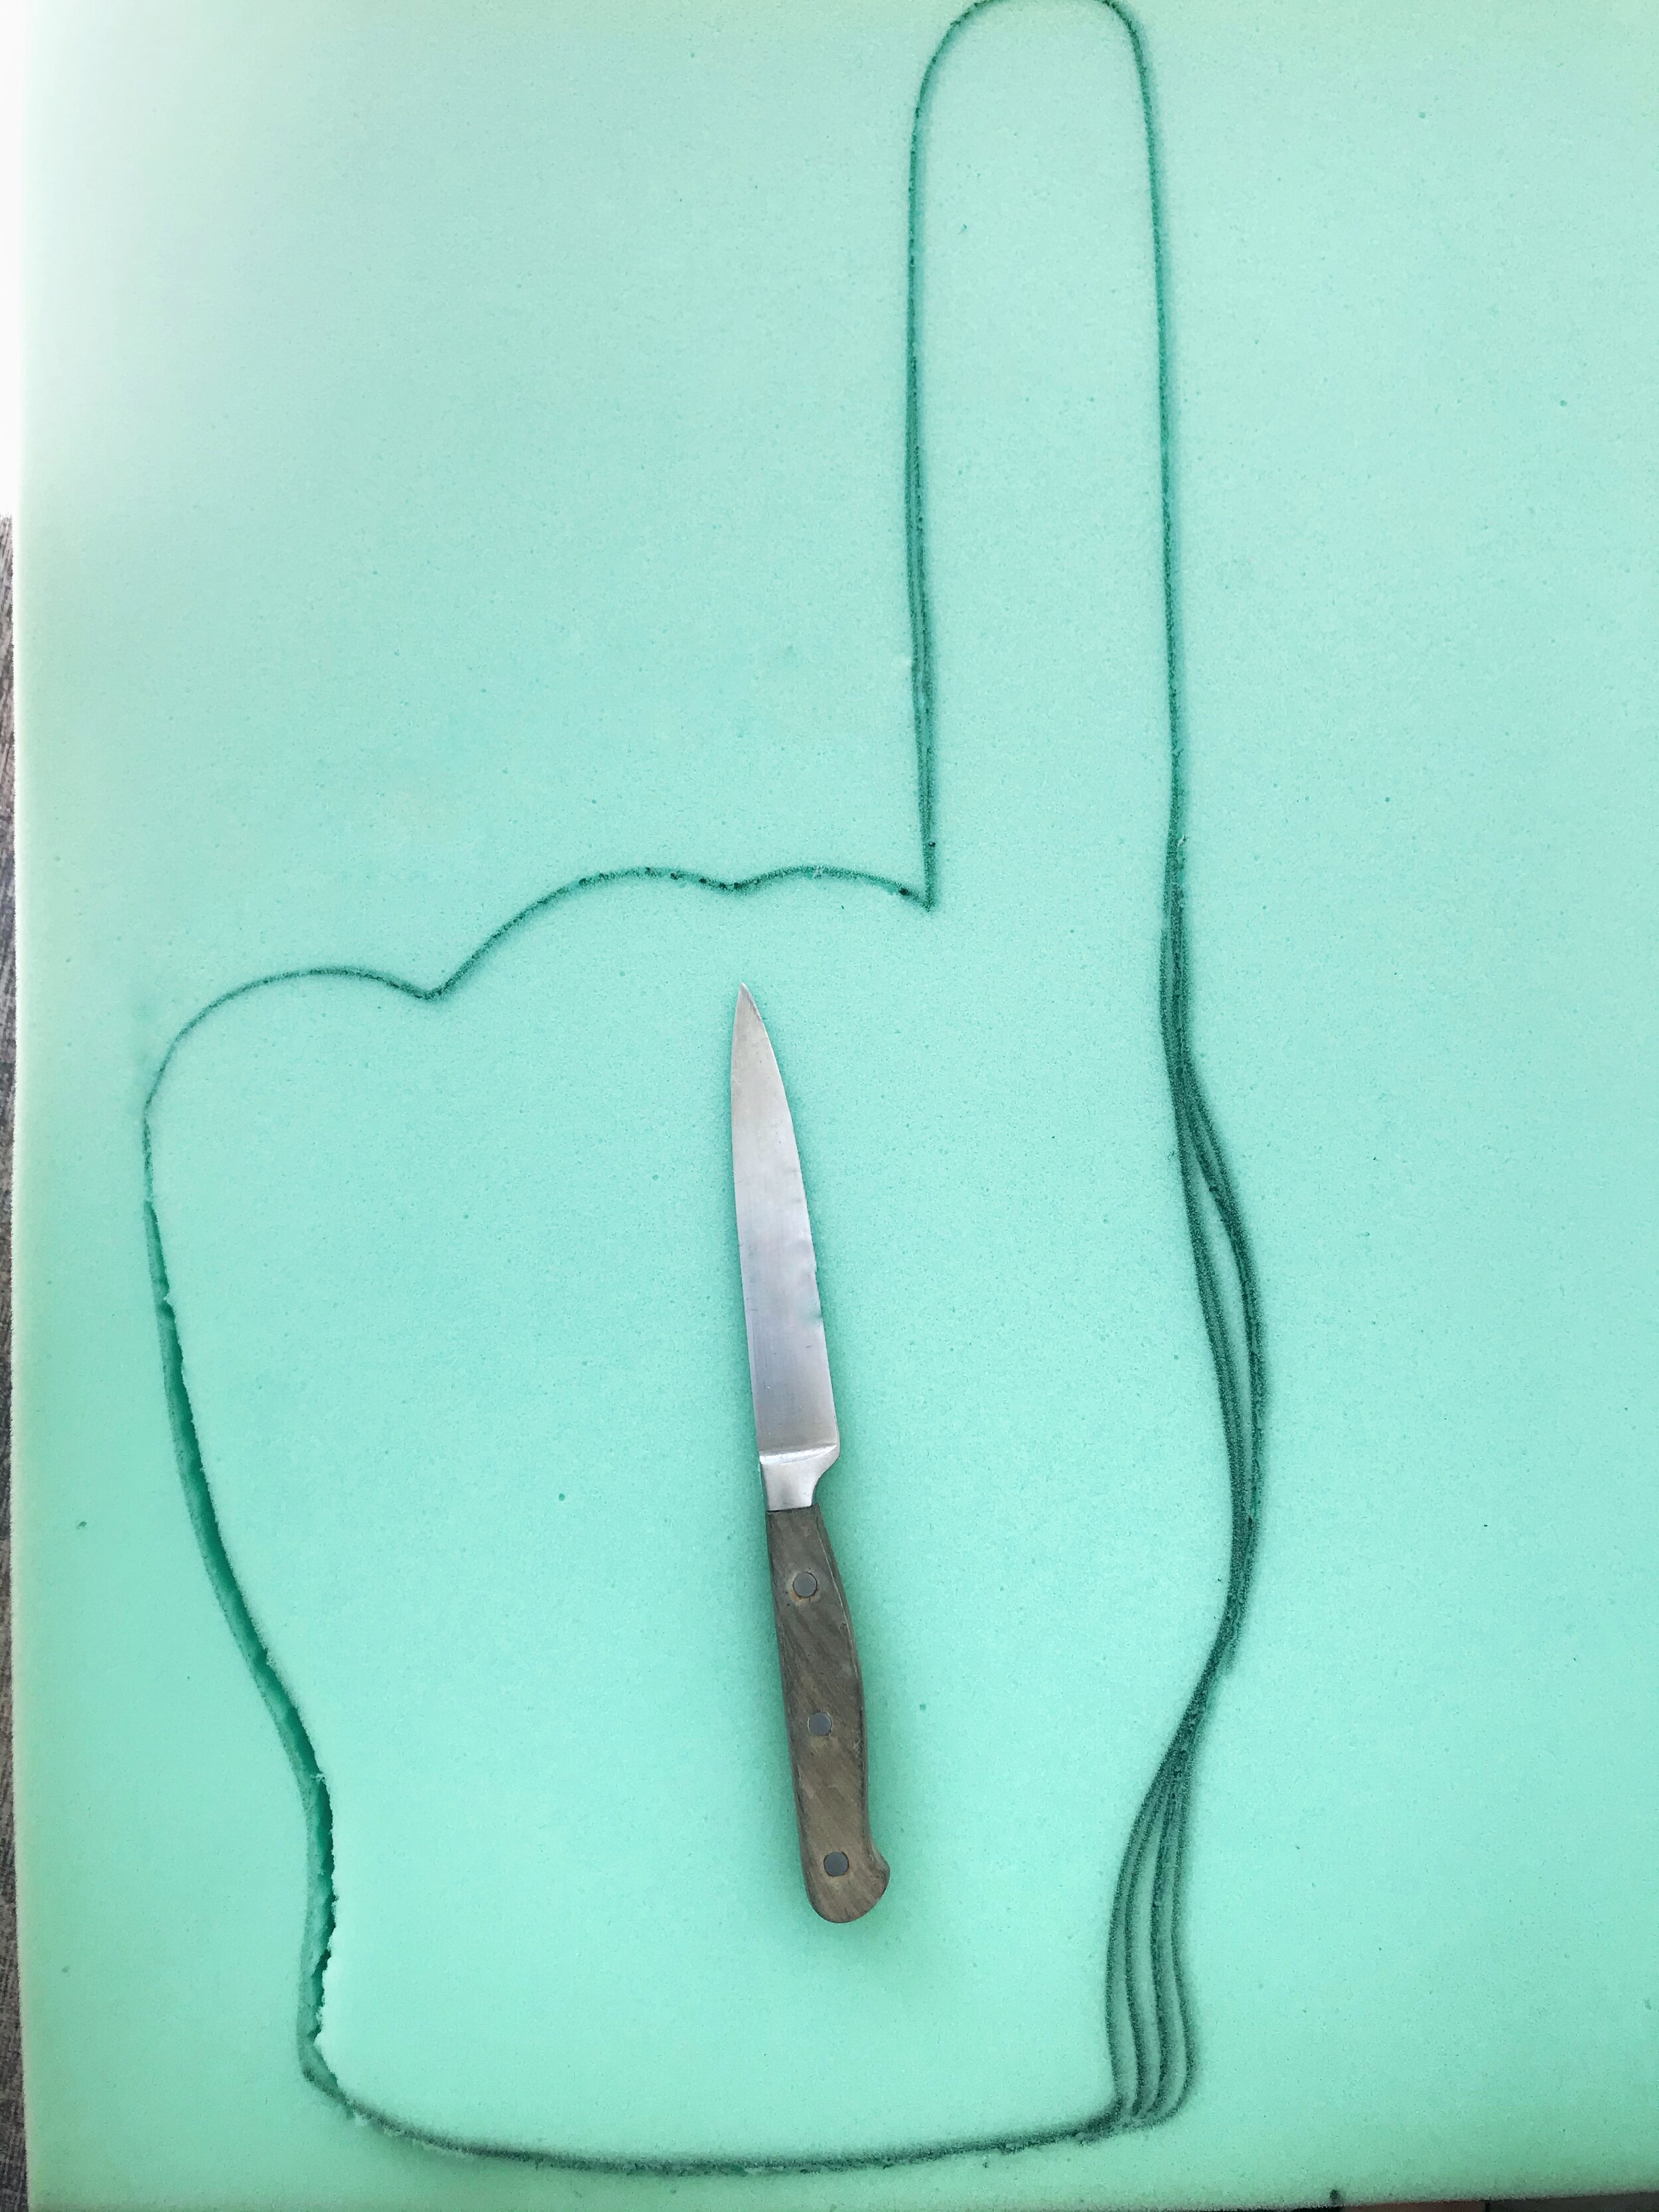
Foam Finger Template — You’ll want this printed to size (13.5” x 24”)
3” x 13 1/2” x 24” Upholstering Foam
Bread Knife (a steak knife or a box cutter could also work)
Spray Paint (One can of white plus one can of the color of your choosing)
Acrylic Paint
Foam Brushes and/or Paint Brushes
Here’s What You Do:
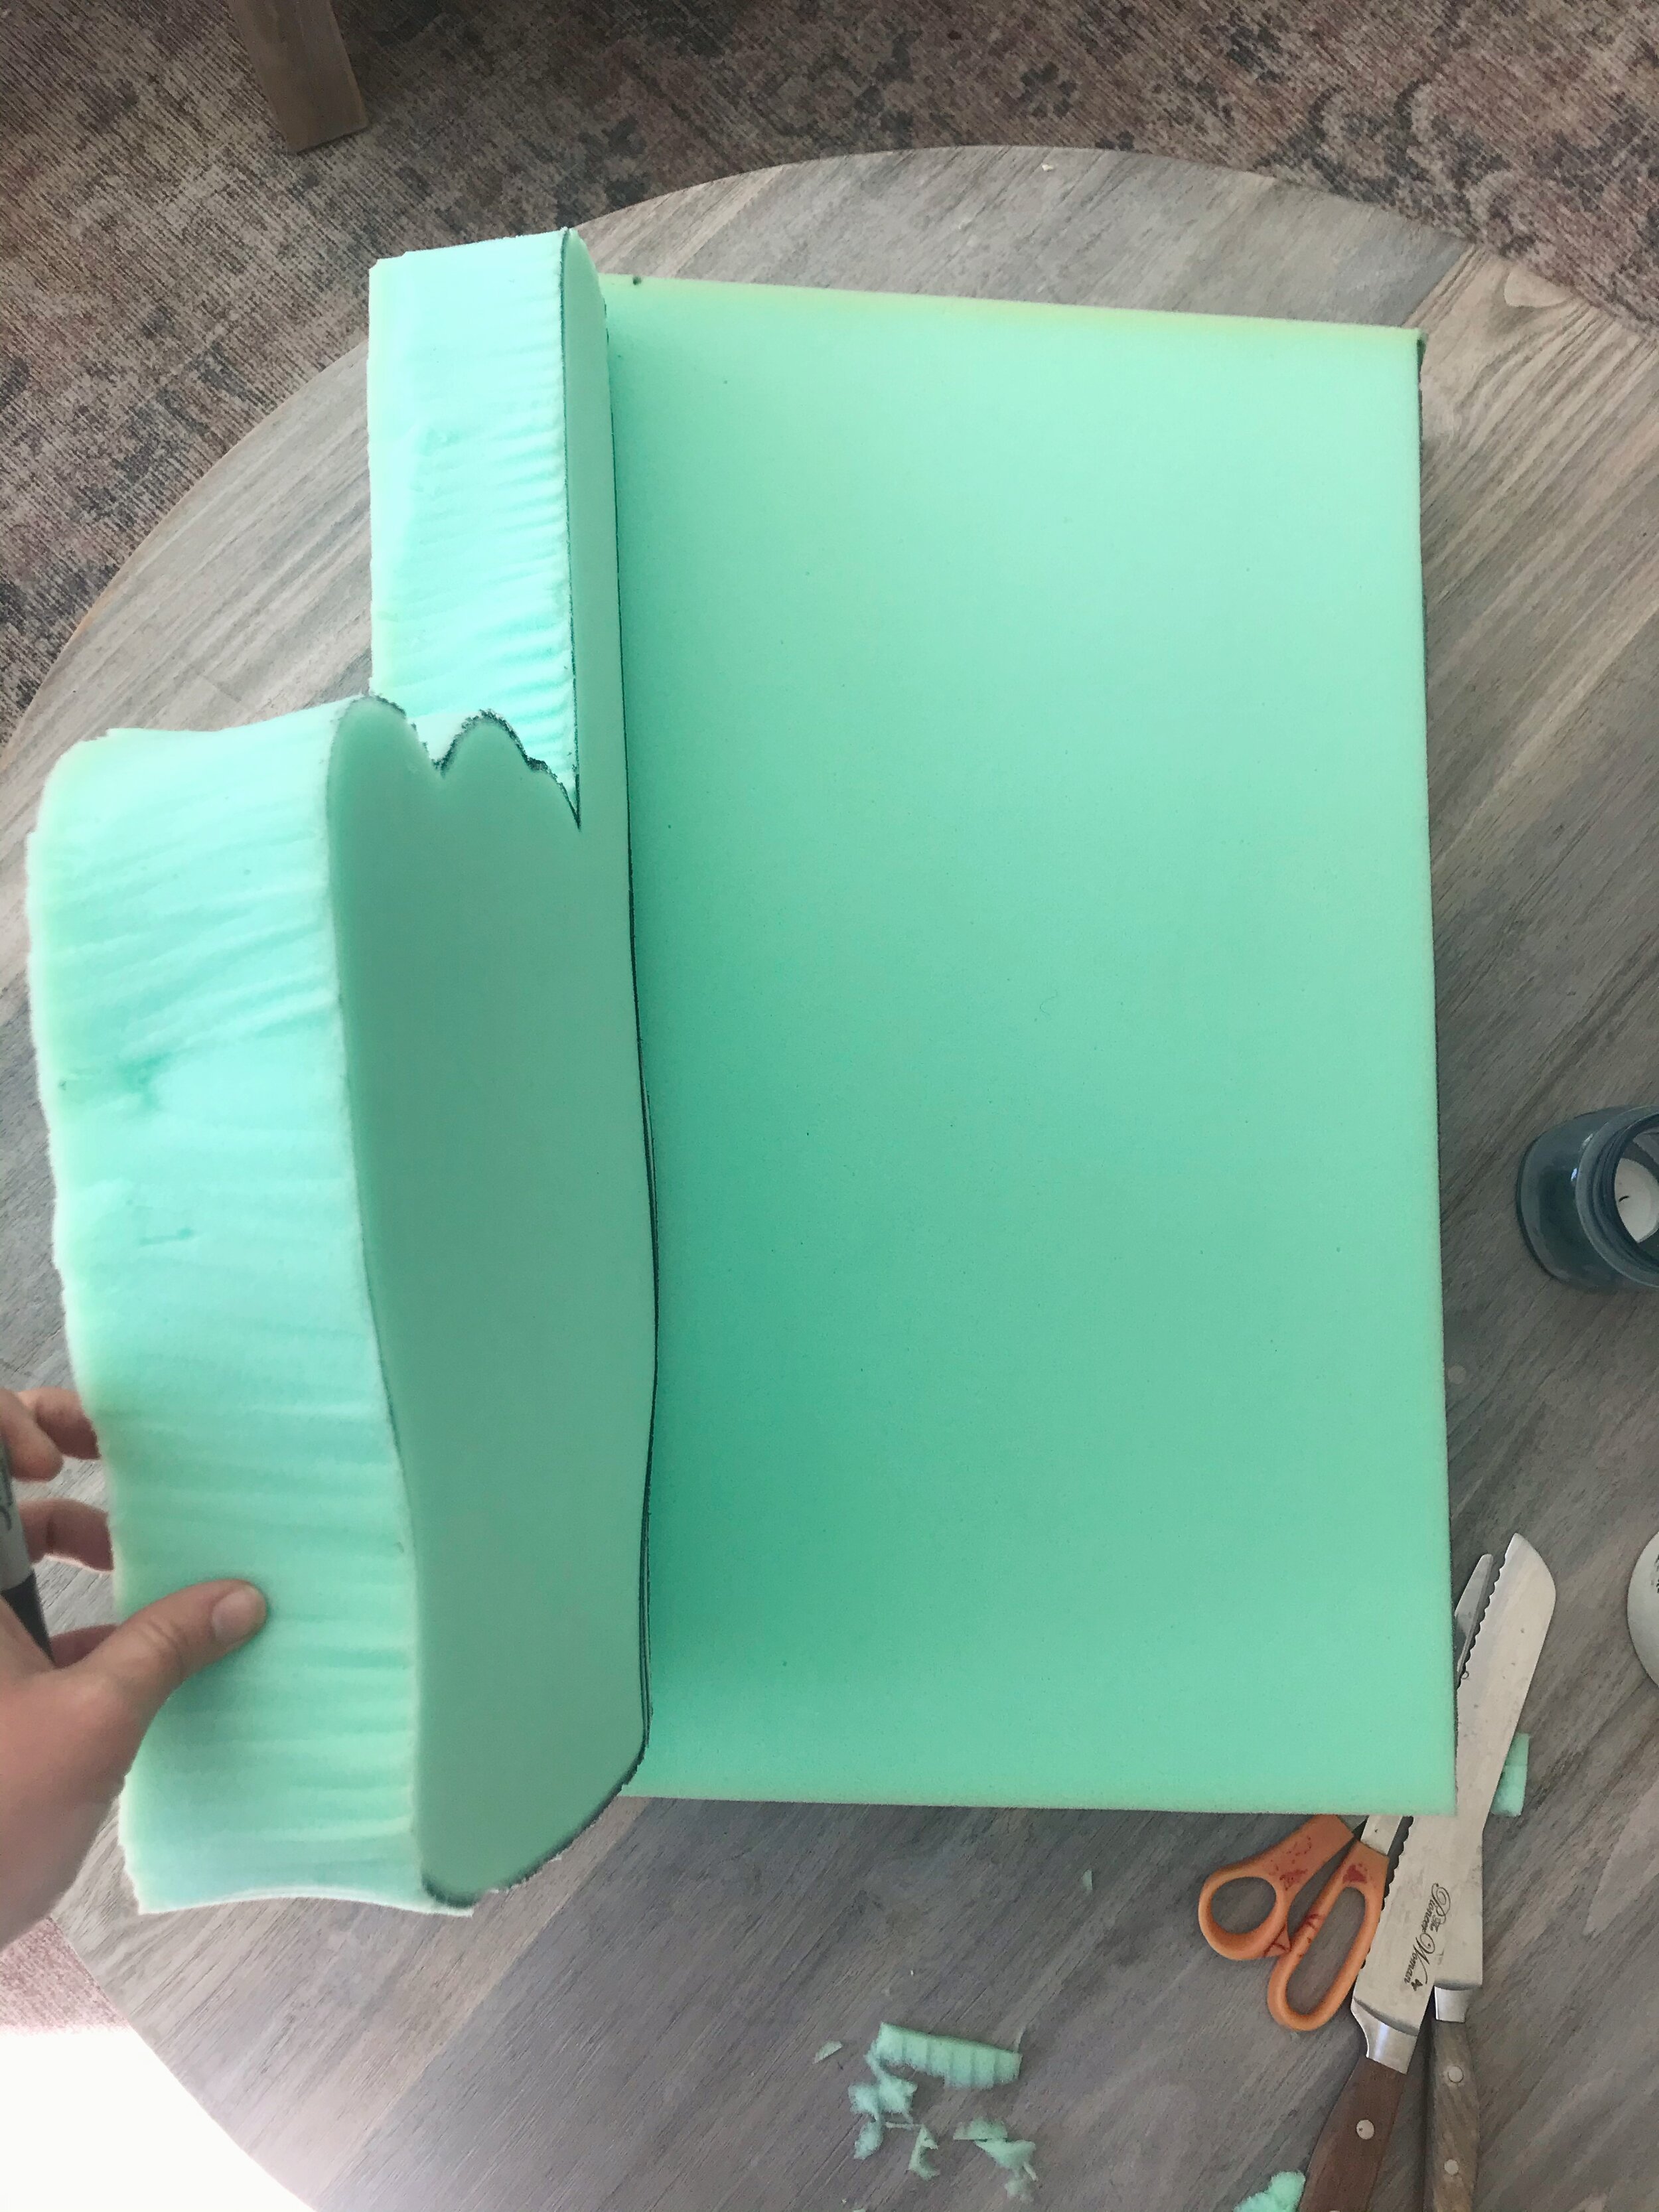
Use the Template to cut out your finger from the foam.
I found that using a bread knife works best for long straight cuts, and try sliding threw the foam many times rather than sawing it. For curves, switch to a smaller knife without teeth and try use the same method. I did a bit of sawing and it made my edges a bit more jagged than I would have liked them to be.
Cut a slit on the bottom part of the hand, through the middle.
This is where your hand will go. I did the sawing motion here just because you have to go pretty deep to get your hand to fit, and it’s just the inside of the hand—it doesn’t need to look as pretty.
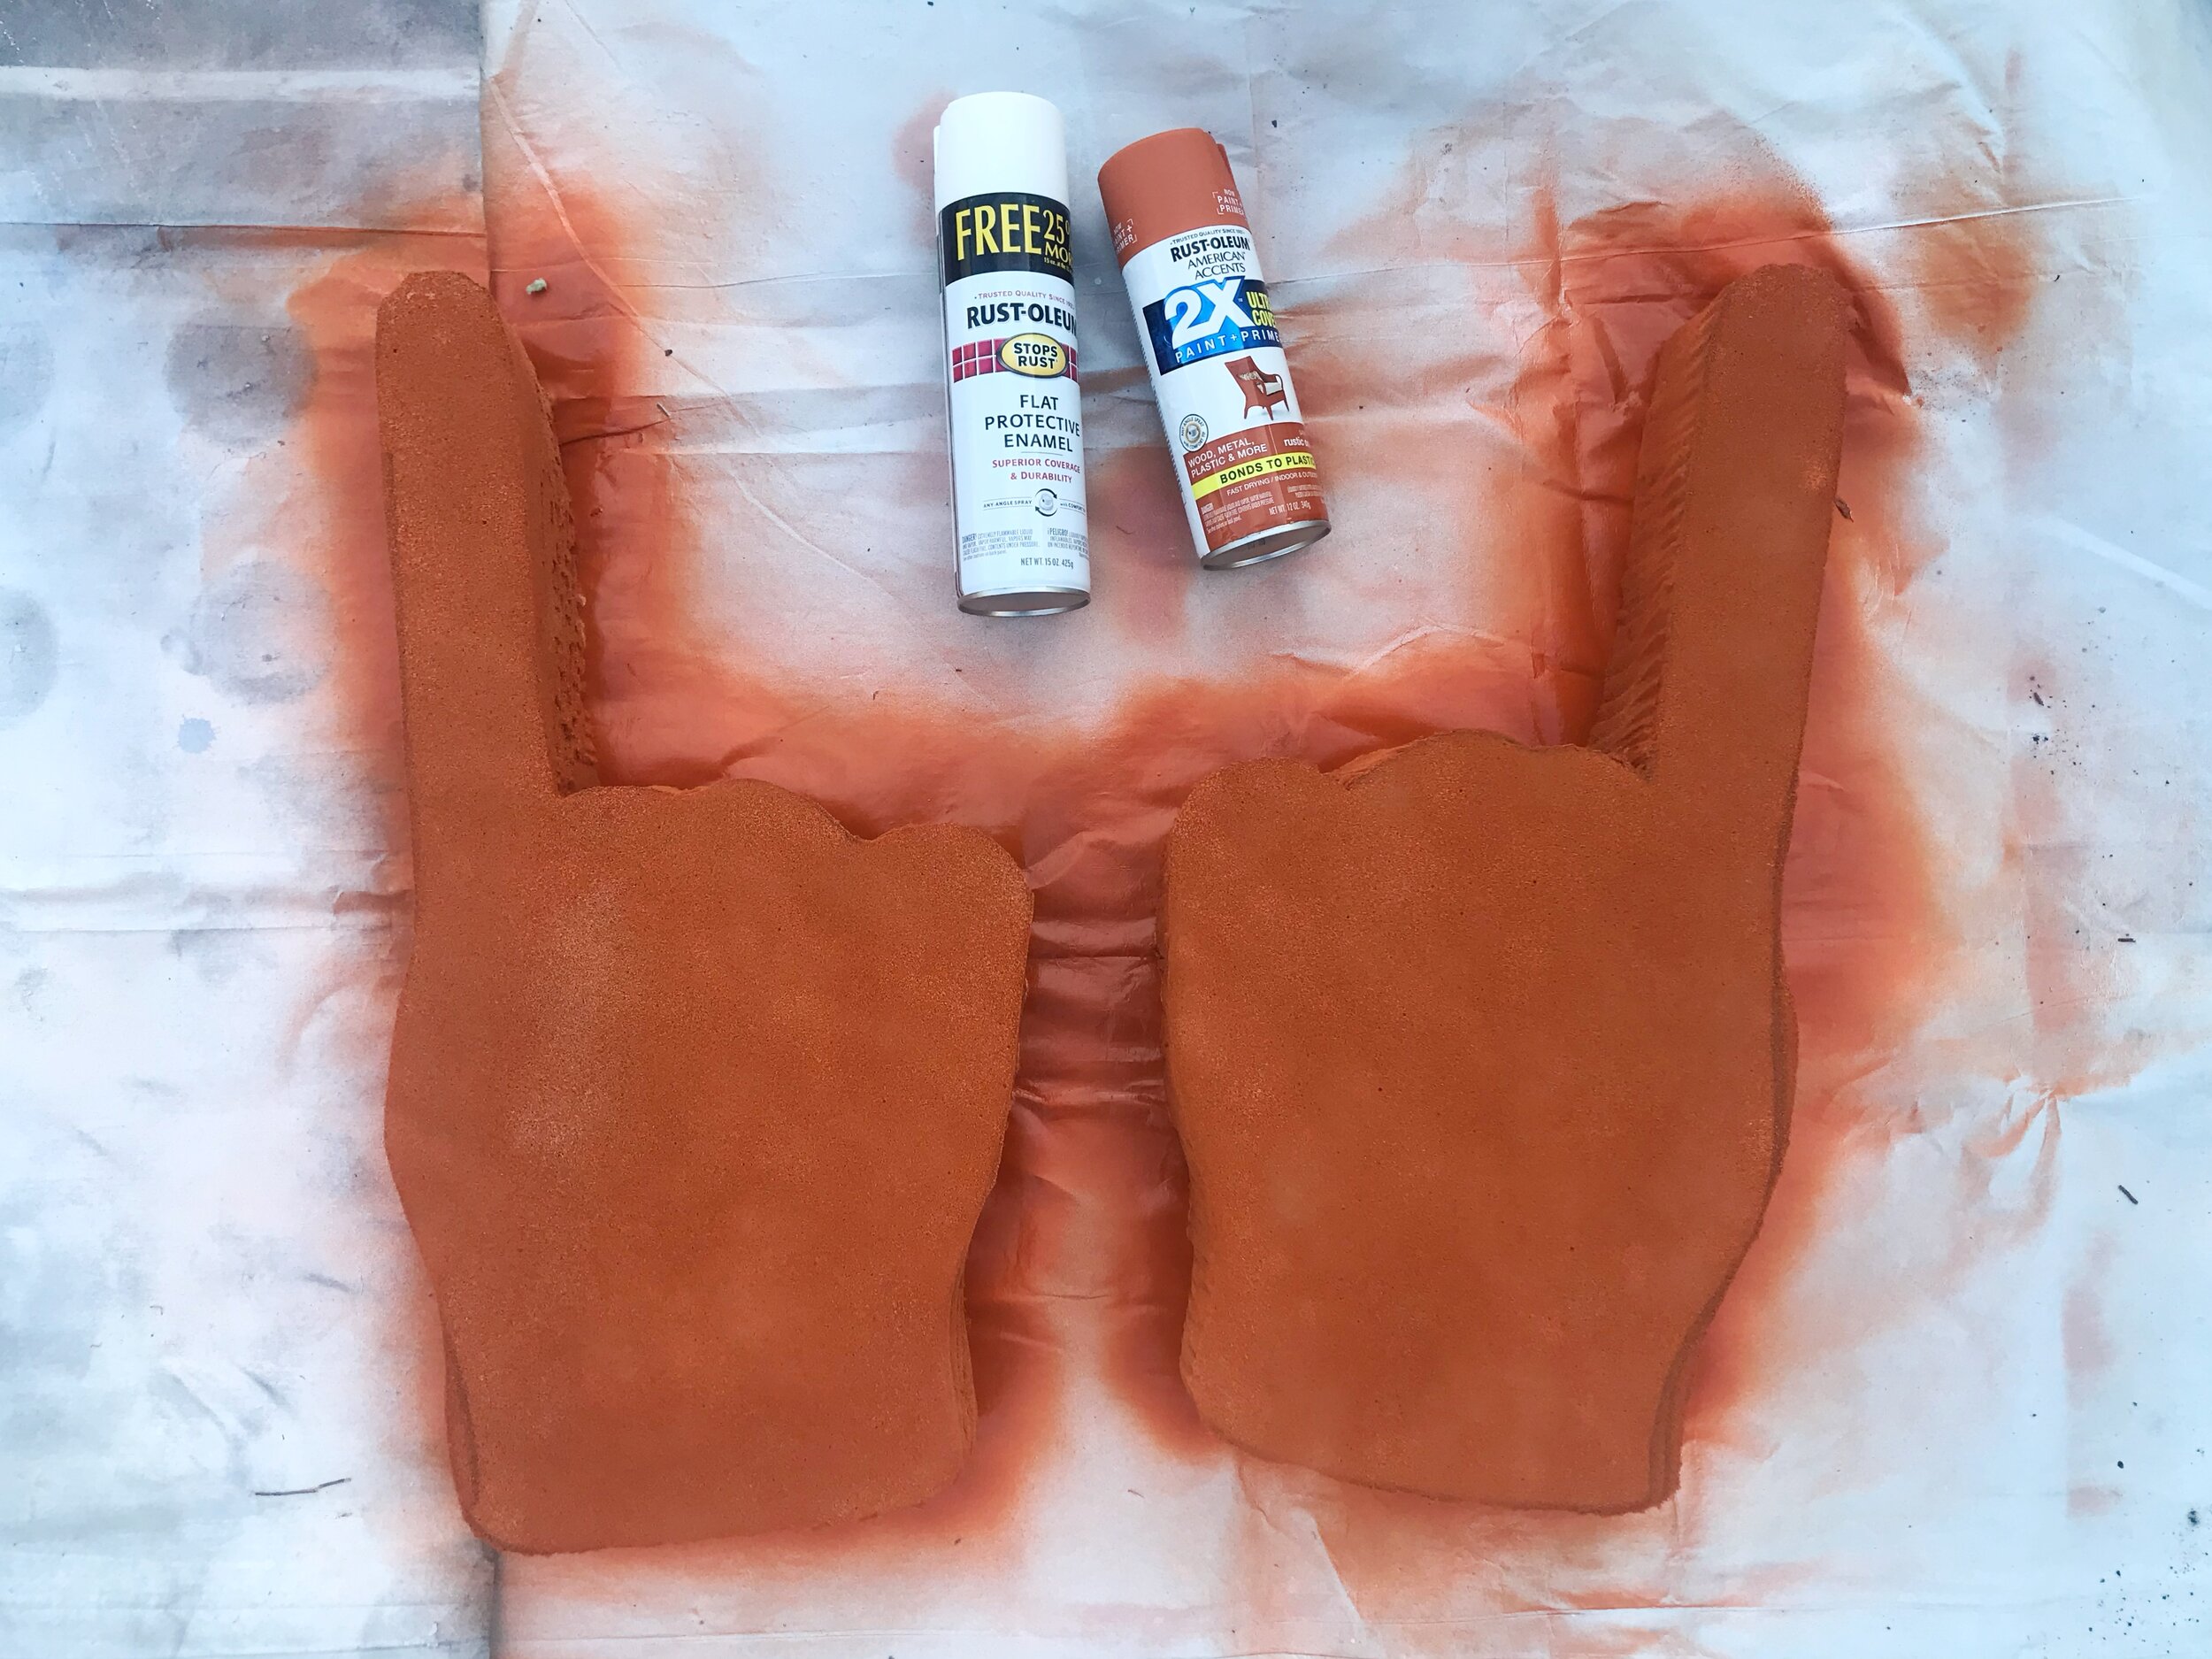
Apply a single coat of white spray paint to all sides
After the first white coat dries, apply a second coat of the color of your choosing.
The upholstering foam I bough was green, and the color came out a bit better when you have a white layer of paint down first before applying the color you ultimately want your finger to be.
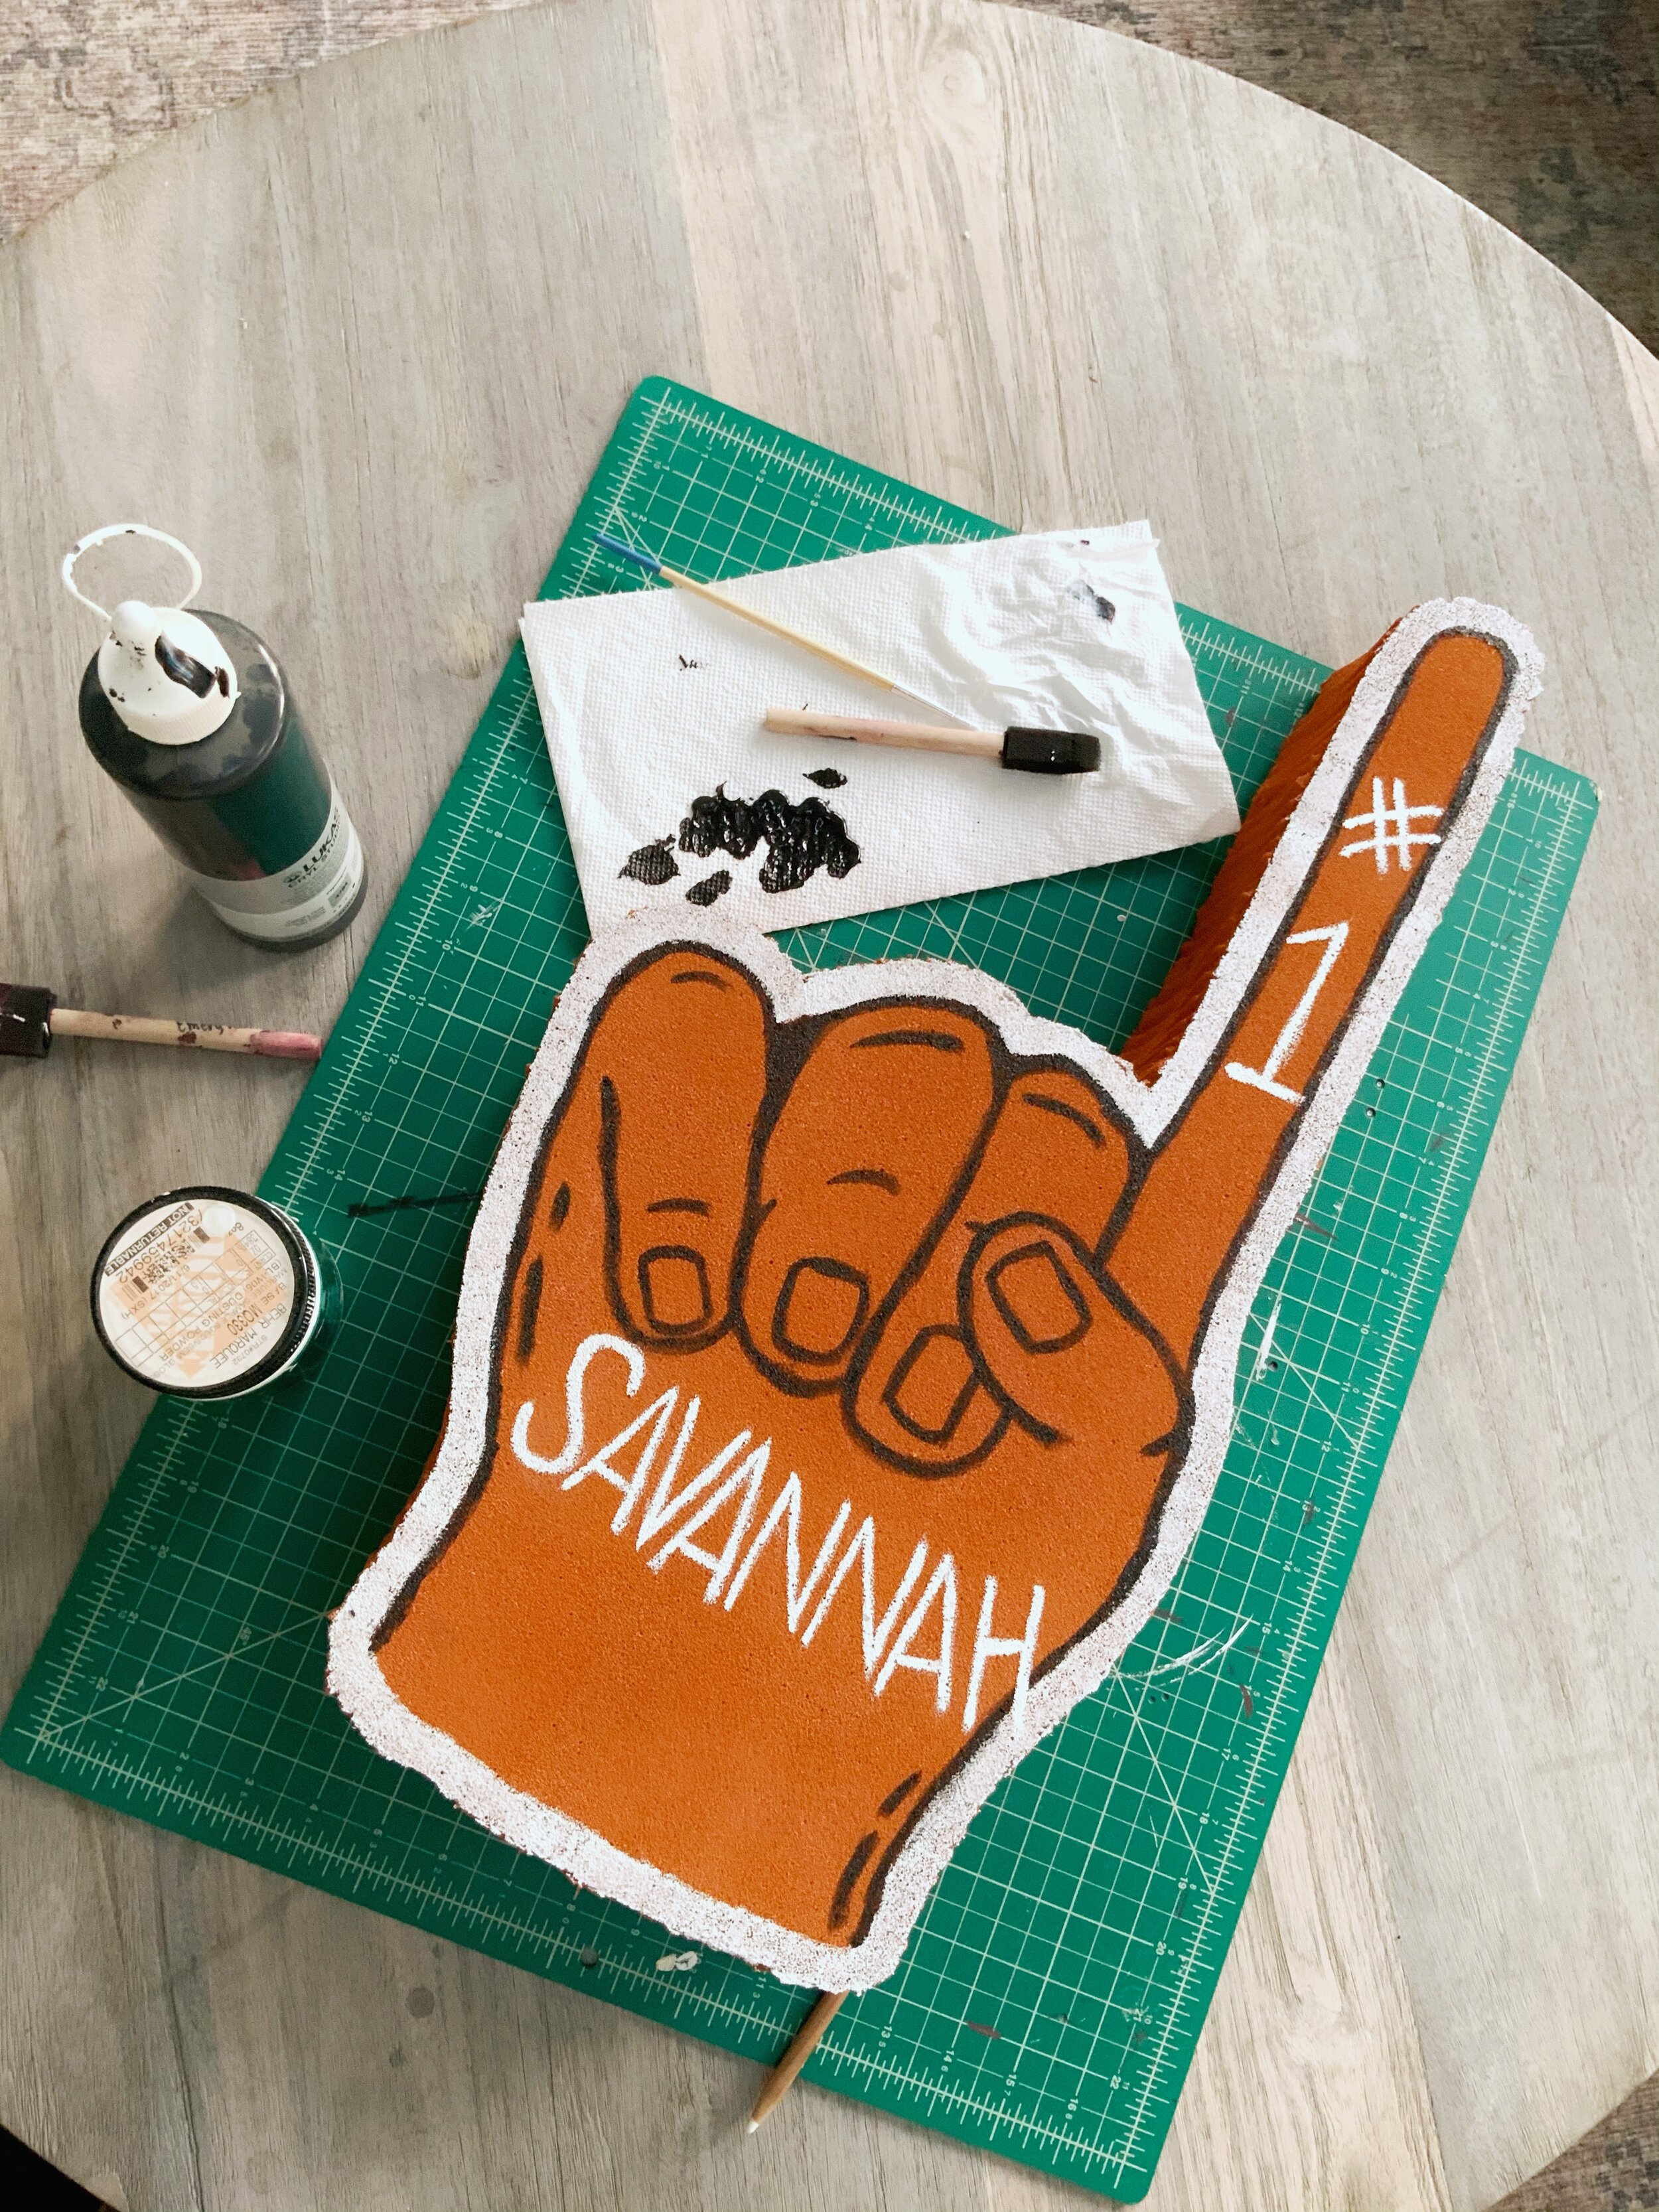
Once the second coat has dried, you may start painting your foam finger with the acrylic paint.
I free-handed this part, but you can always use the template for reference. I first outlined my hand with white paint and then went back in with black paint for the details.
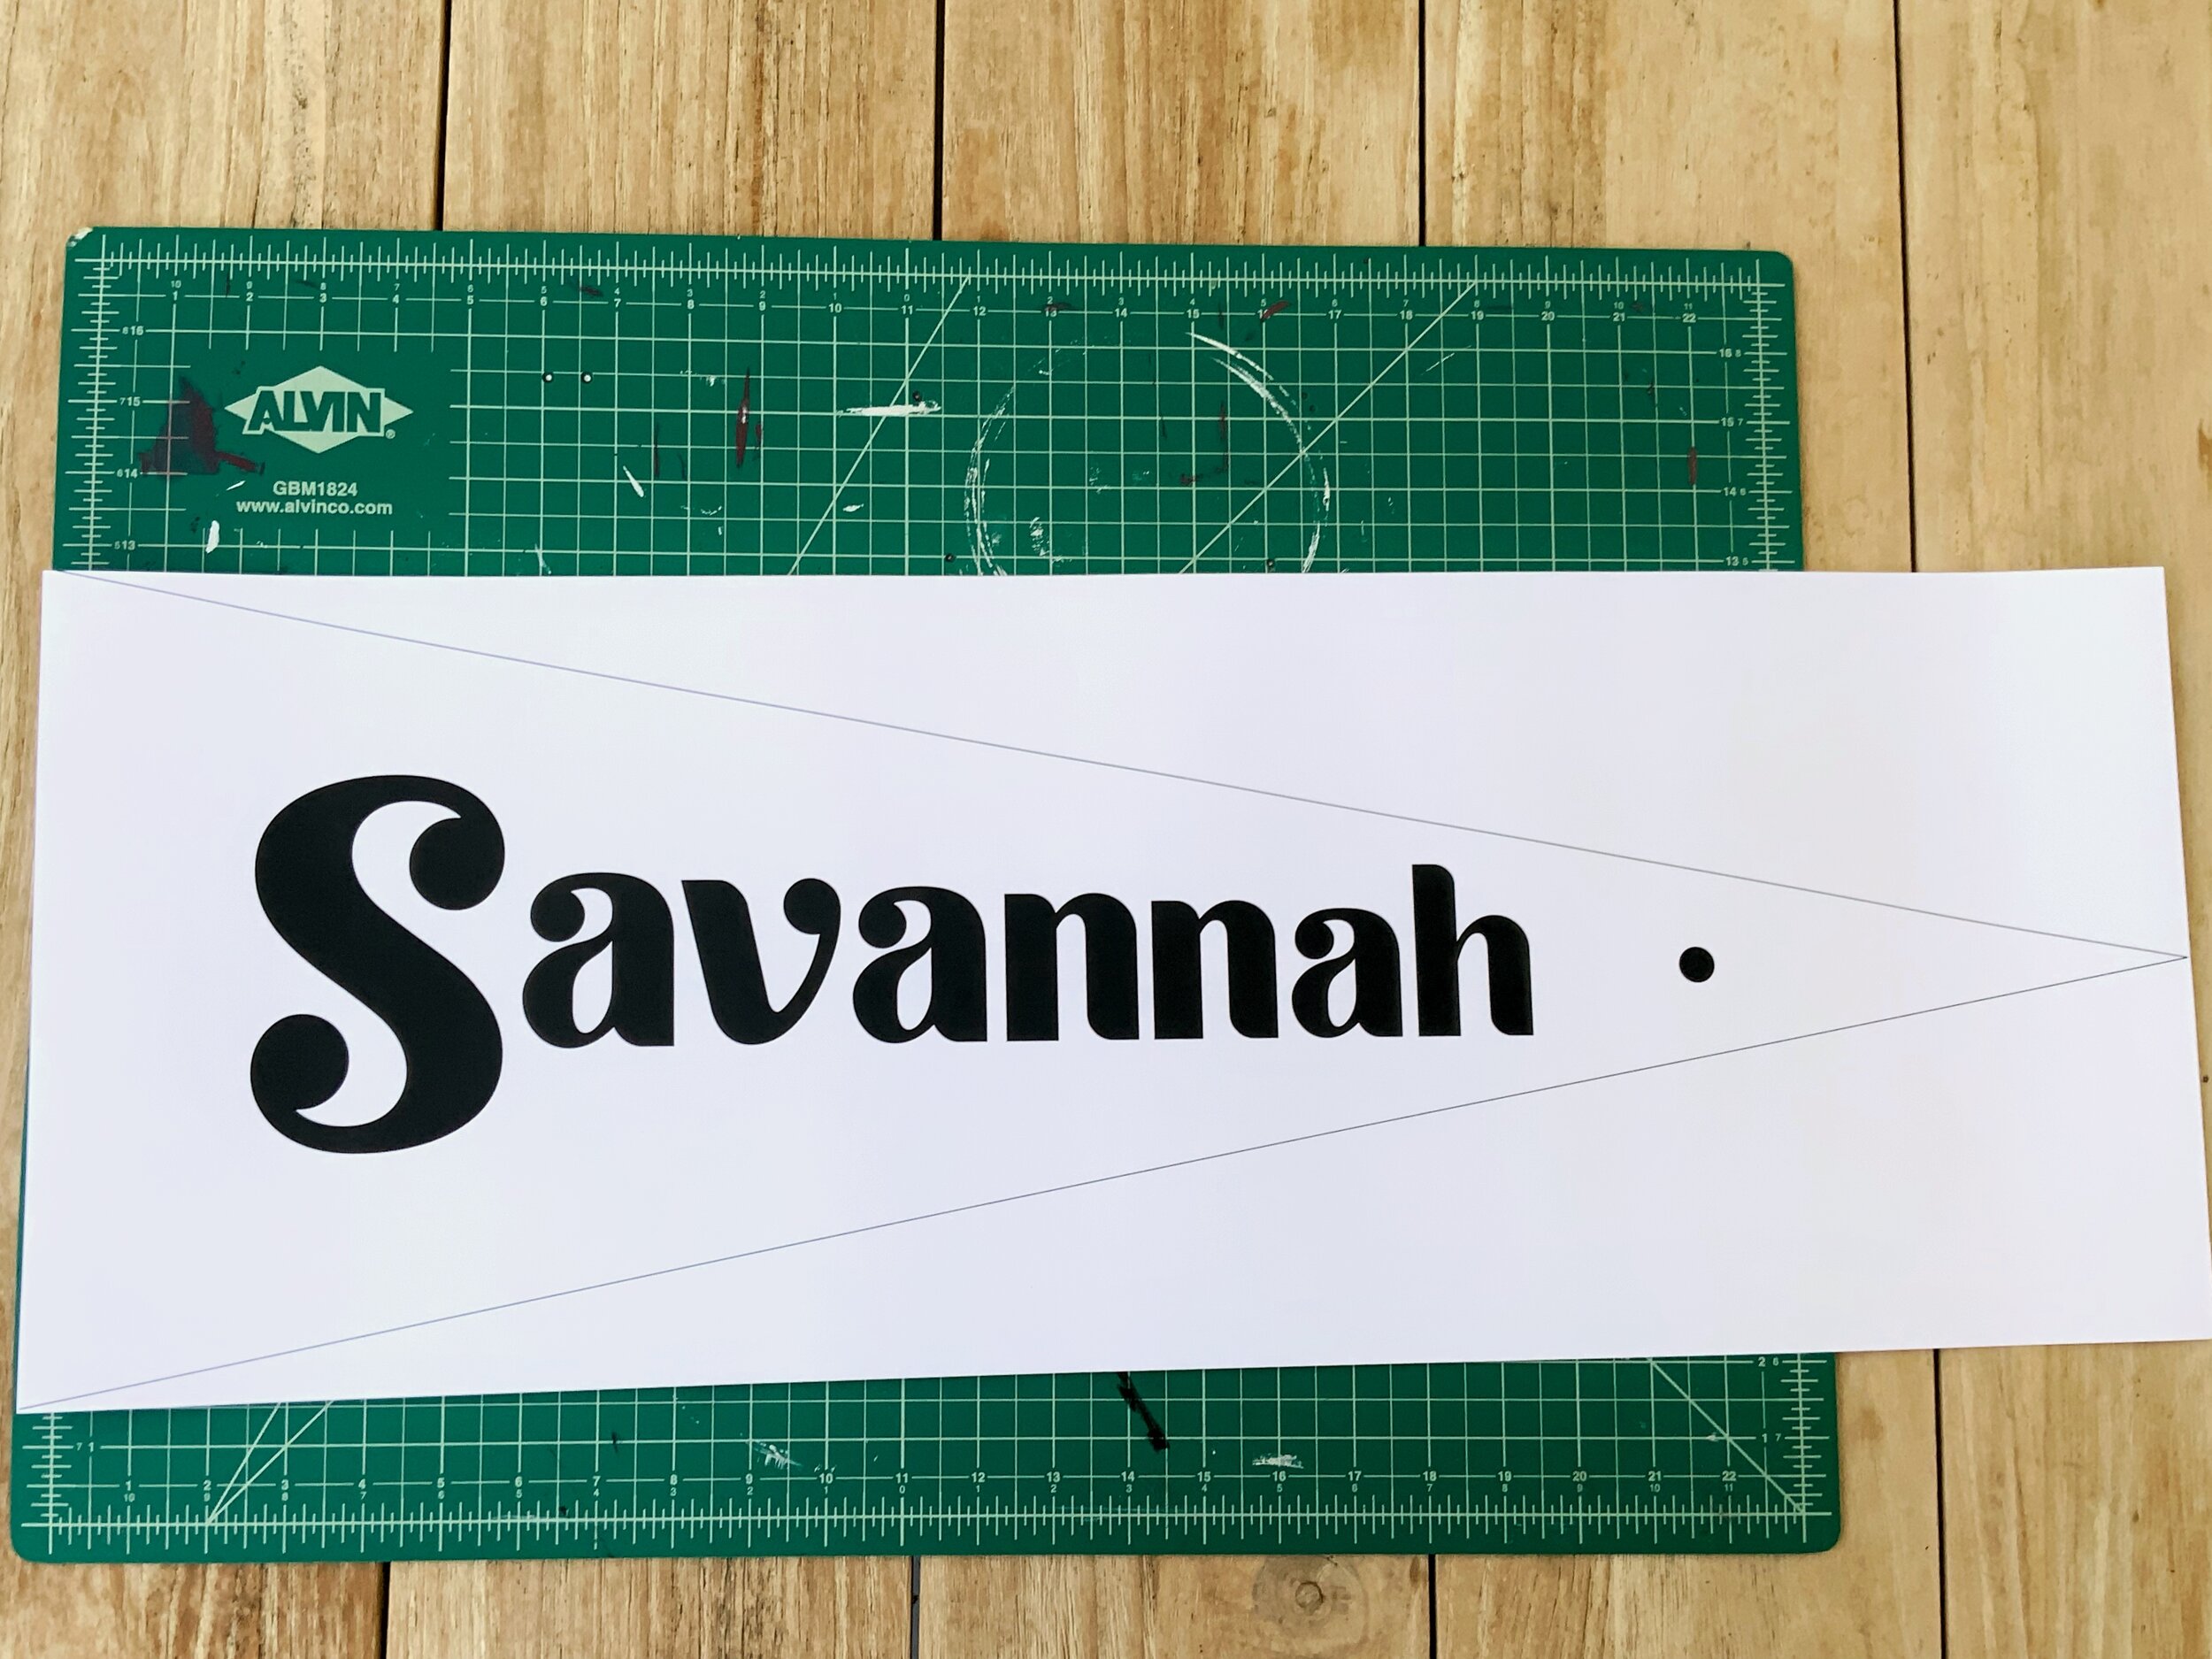
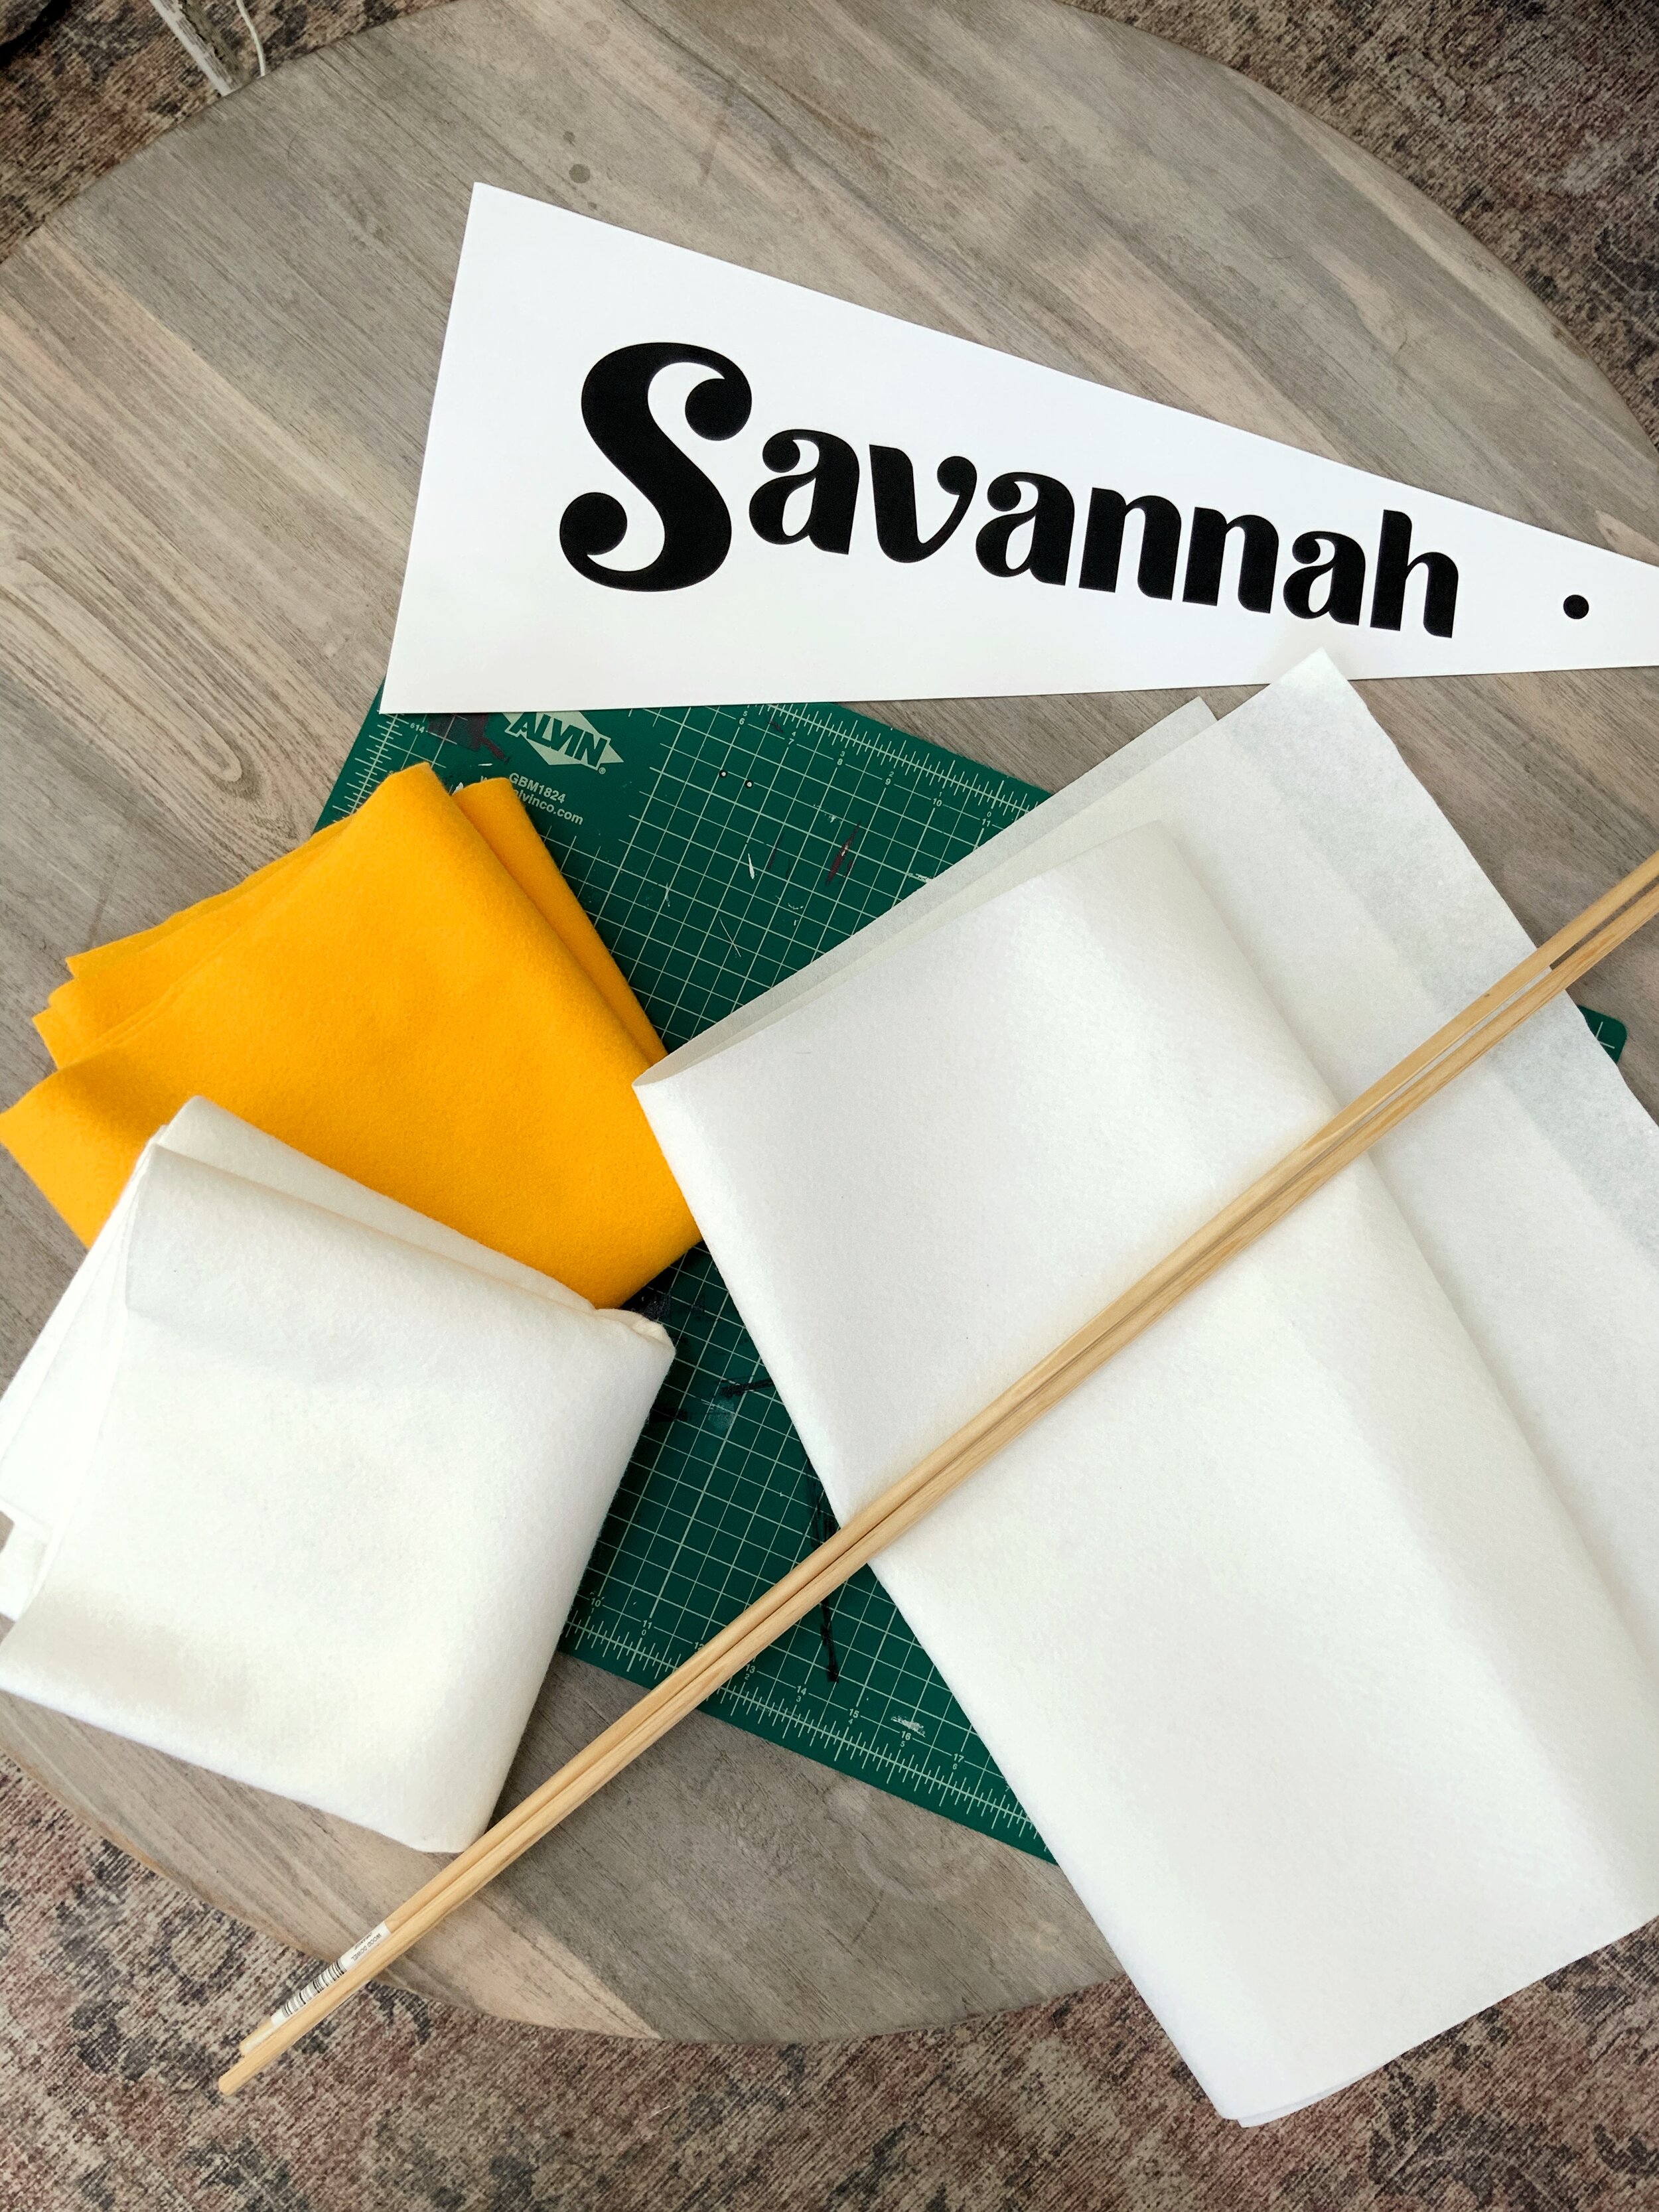
DIY No. 2: Felt Pennant

Here’s What You Need:
Pennant Template — You’ll want this printed to size (11”x 29”)
12 x 30” Pellon (Extra Firm)
12 x 30” Craft Felt
Extra felt for other colors you would like to use (or paint if opting for a stencil)
Yard Stick
Hot Glue Gun & Sticks
Rotary Cutter (or scissors)
Sewing Pins
Marker for Tracing (or X-Acto Knife if opting for a stencil)
3/8” Dowel (optional)
Here’s What You Do:
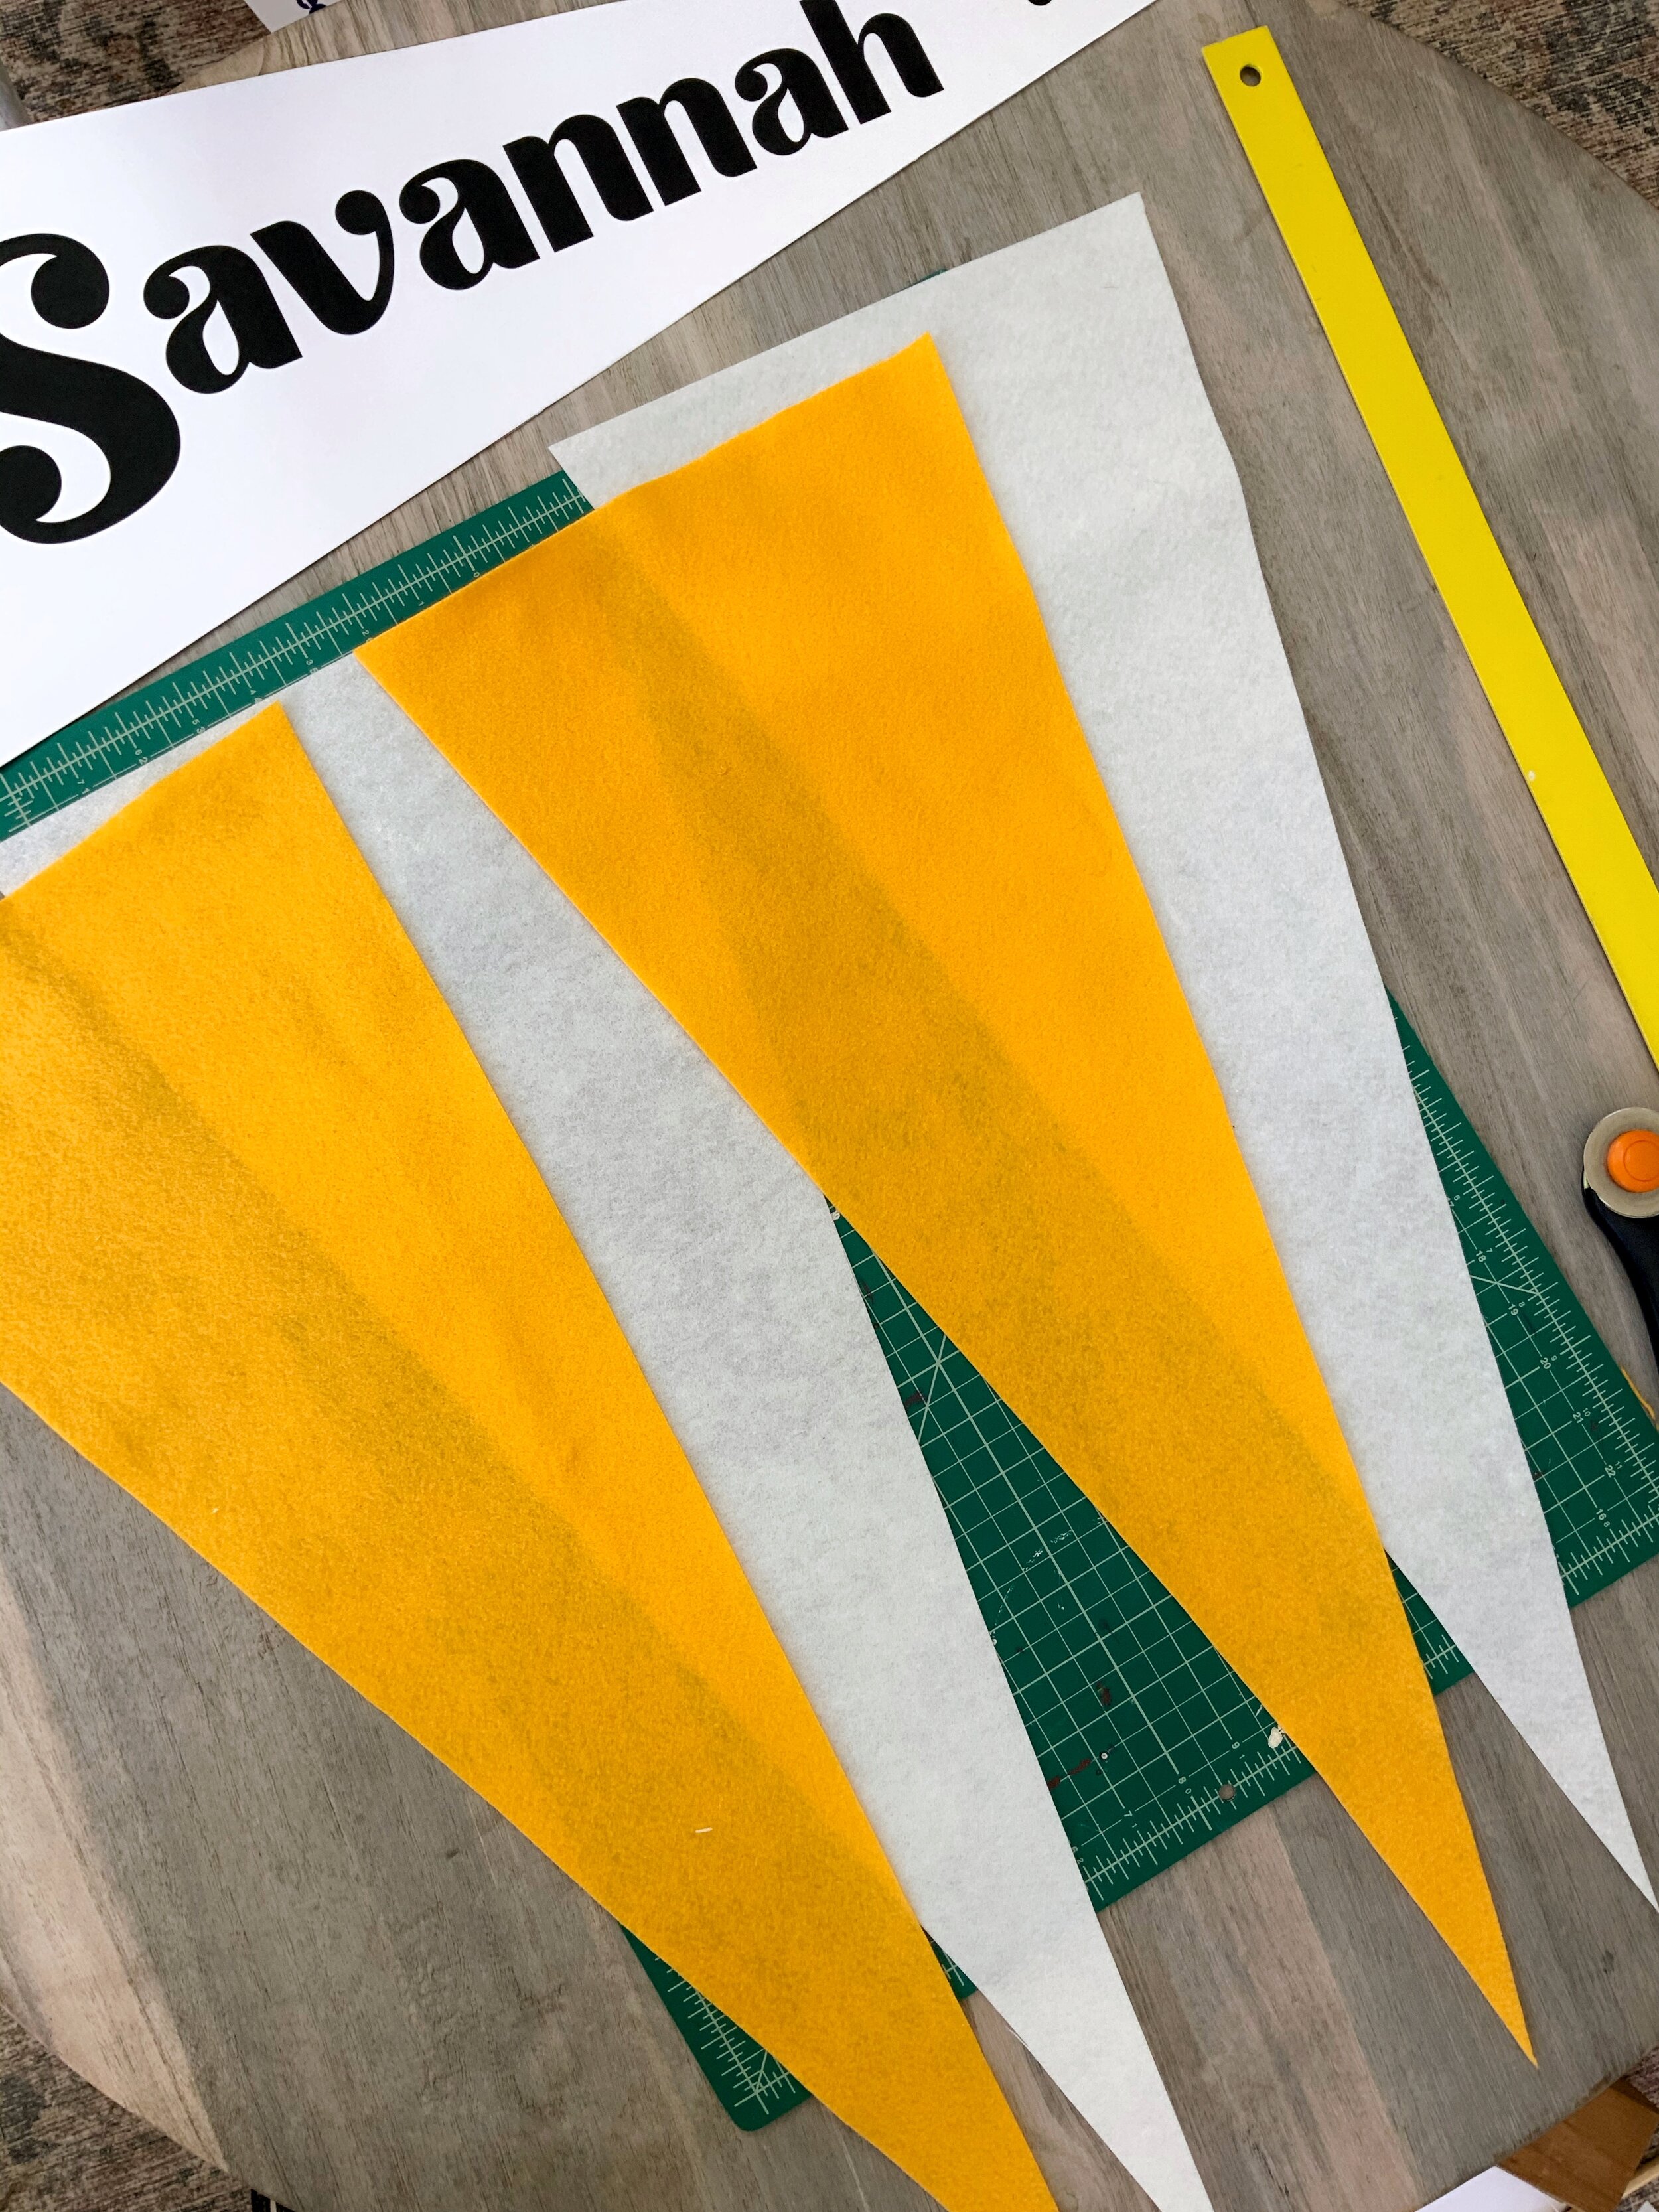
Use a rotary cutter or scissors to cut out your template
Place the template on top of the Pellon and the 12x30 felt and cut it out.
You may use sewing pins to help hold the template in place. I used my rotary cutter and a yard stick to cut my lines and applied pressure just to hold it in place.
Hot glue the Pellon and the felt pieces together.
If you would like your pennant to hold a dowel, refer to the template to see where you need to hot glue the Pellon and the felt together.
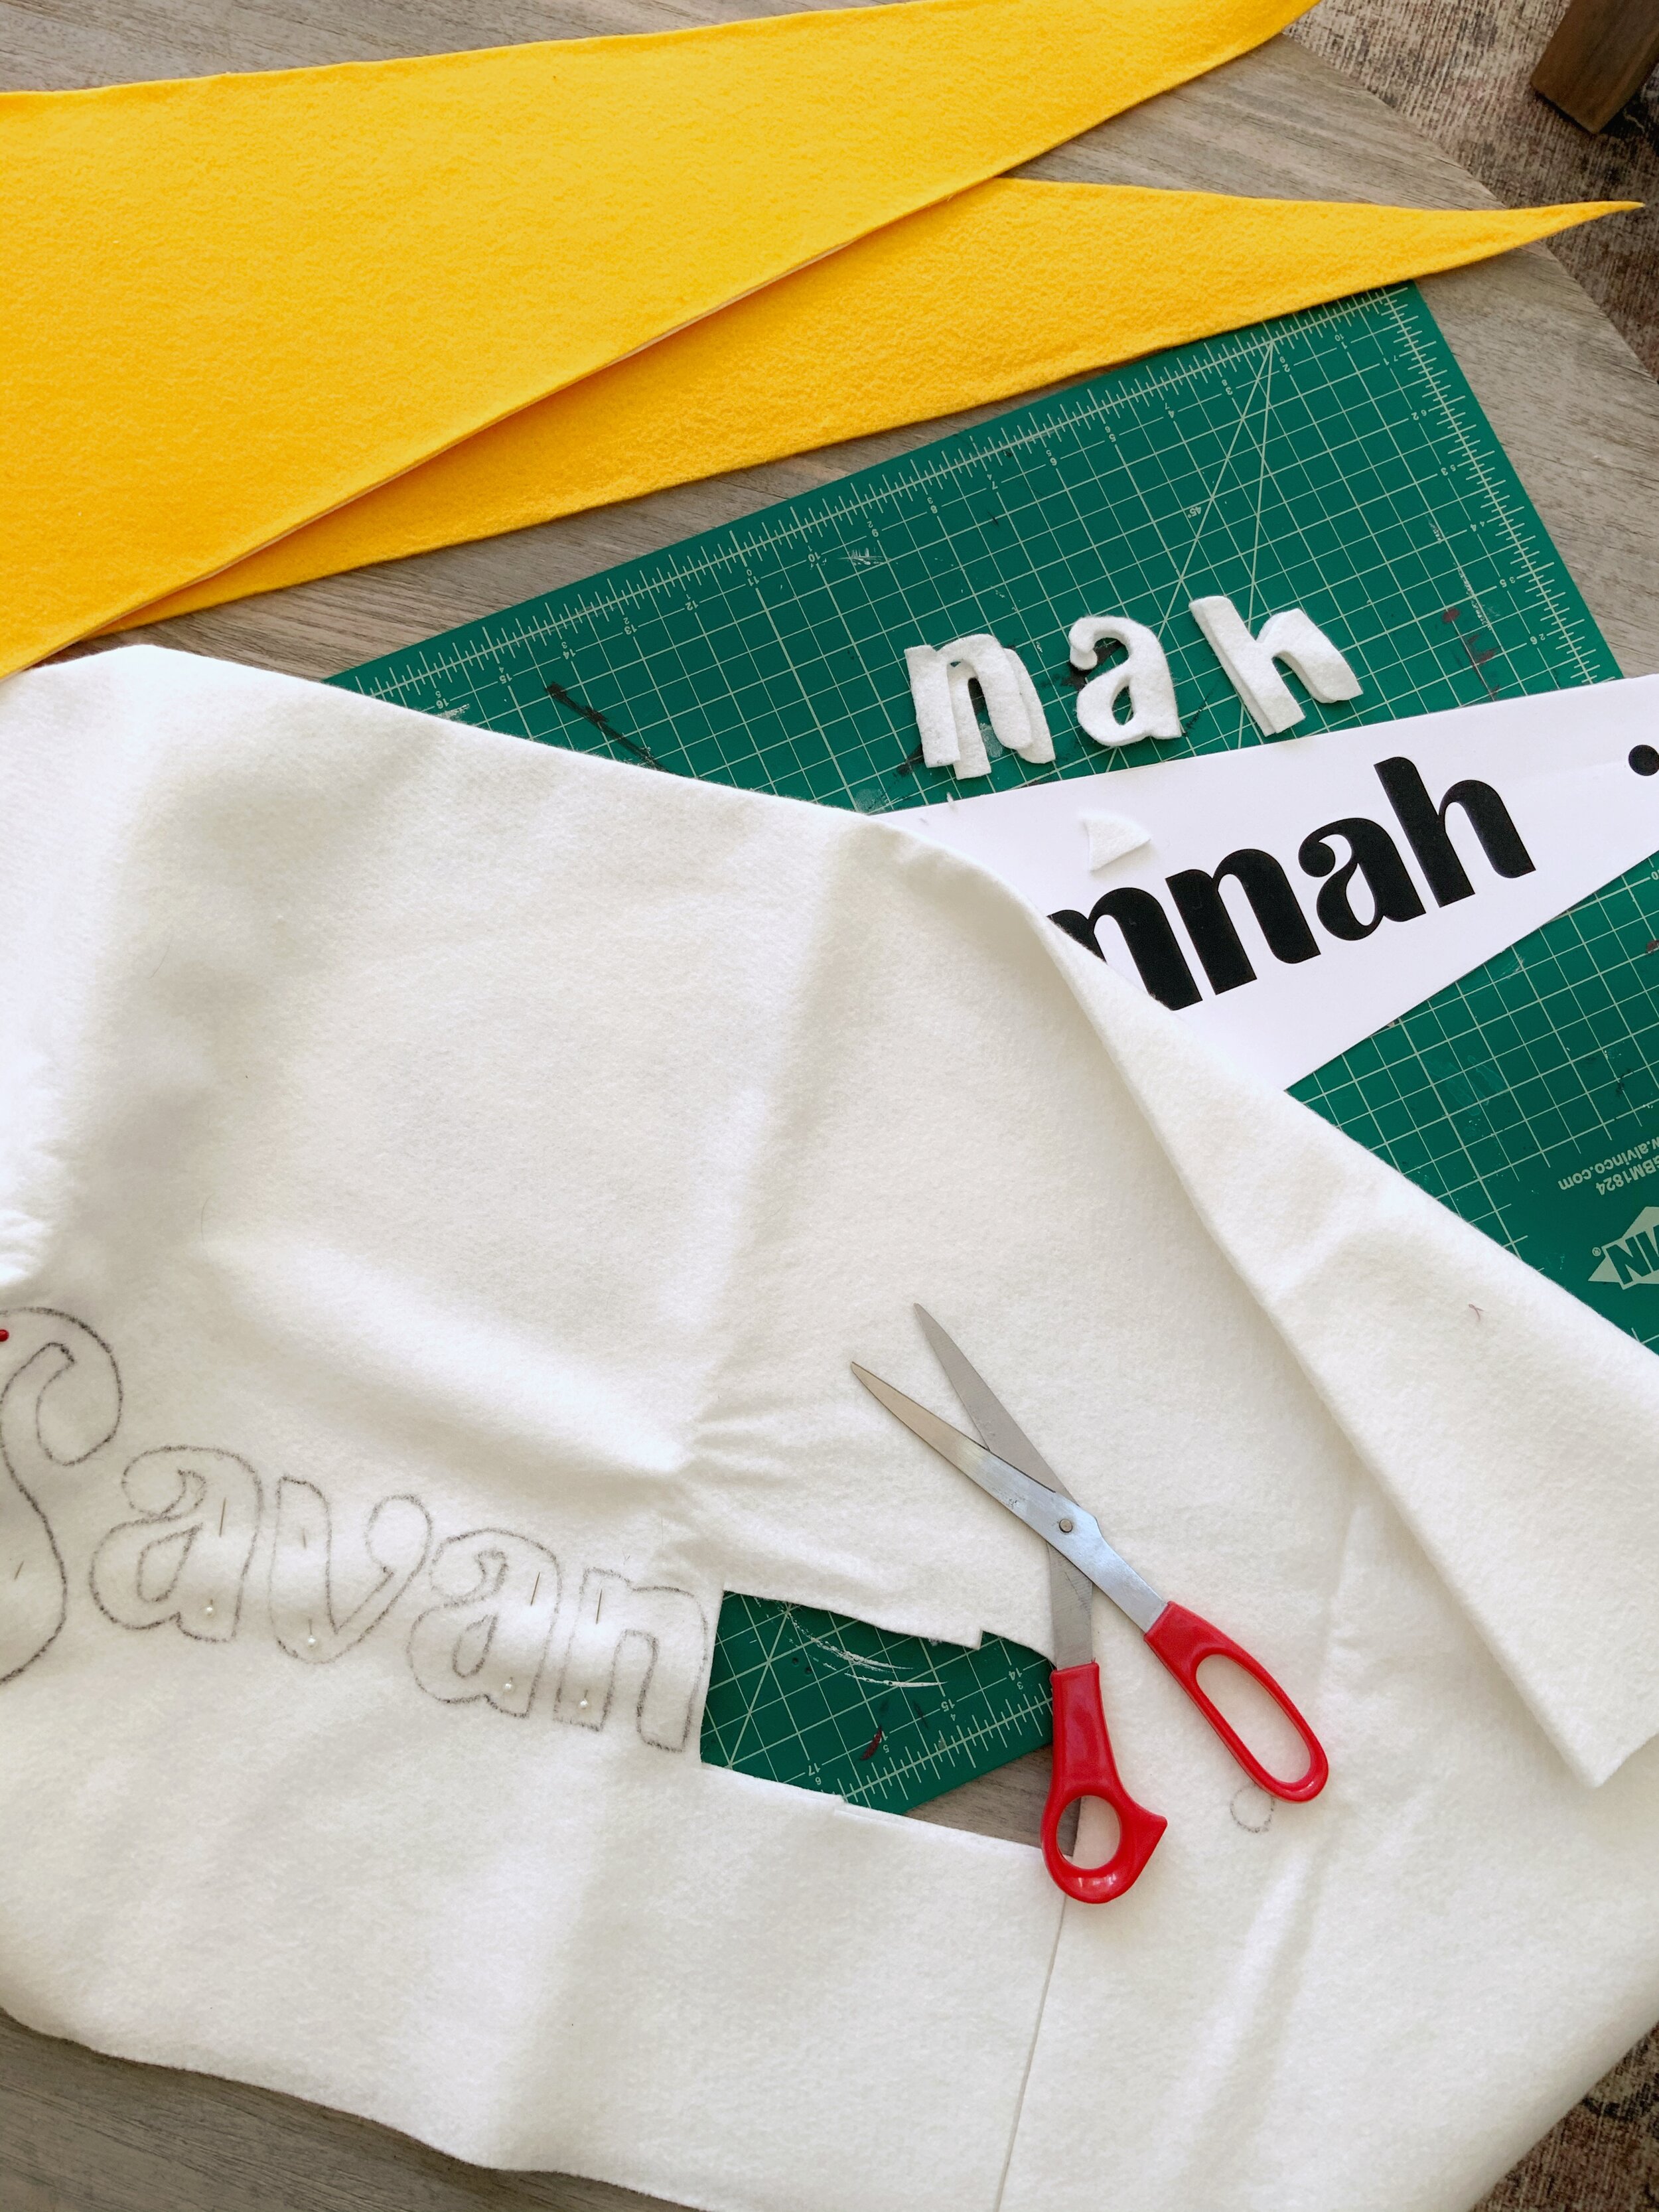
Use template to trace your design, or use an x-acto knife if you’re planning making it into a stencil, and painting it.
Cut out any design pieces with scissors
Hot glue all design pieces onto the pennant
Wait for the glue to completely dry, insert the dowel, and give her a spin.
DIY No. 3: Oversized-Head Cut Out

Here’s What You Need:
Oversized photo of person whom’s head you would like to enlarge. Foam Board (Hit up the Dollar Store! I used a 28x44”
Spray adhesive (But if you thought you had some but actually don’t, you can also use a glue stick. The process will just take a little longer)
X-acto Knife
Here’s What You Do:
Pick out a photo you would like to enlarge.
Try finding a photo with a relatively contrasting background so it’s easier to cut the head out.
Buy your foam board.
It’s important to buy this first to determine how large you need to print the photo.
Get your photo printed at the print shop of your choosing.
I got mine printed at FedEx Print for $25. There’s also a small enhancement fee if you don’t know how to enhance jpg photo files from your computer. I also here Costco does this service for like a third of the price. So if you have the ole Costco membership, it’s your lucky day!
Cut out the oversized photo using your x-acto knife, nice and slowly.
Glue the photo to the foam board.
Use the spray adhesive on the back of the photo and flip it over onto the foam board. Press from the center and move your hand outward to get out any air bubbles. If you are using a glue stick like I did, try only gluing small sections at a time. If you try to rub the glue over the entire photo, I found that my glue started to dry before I could flip it over, and I was moving pretty quickly.
Once the photo is glued onto the foam board, use your x-acto knife again and cut the foam board around the photo’s edges. The sharper your blade, the easier this process will be.
Touch up any edges that need a little extra love, and you’re done!
Once we attend Savannah’s graduation, I’ll do a little follow up in the post about how it all went. I hope you guys like these DIYs. Not too shabby for my first mult-DIY blog post, wouldn’t you say? I would love to hear about if anyone tries any of these and how they turn out. This is definitely a more creative design DIY, than a “copy and paste” DIY. Regardless, these were all super fun, and the oversized head is definitely my favorite. I can’t wait to see Savannah, see her huge face in the audience.
And if you’re interested in seeing more elaborate videos and explanations of all my DIYs, be sure to follow DEERYARD on Instagram